Tag Archives: Script

Deploying MaxScript Tools

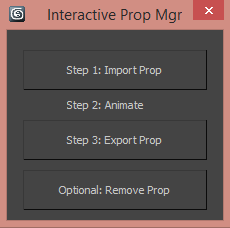
Here’s a brief description of a simple setup I created for deployment and update of tools over SVN at my workplace. Prior to this, tools were inefficiently being shared as separate files on a case by case basis. I knew the setup would need to be quick and straightforward from the designers/artists’ perspective. I did not want the end user to spend a lot of time or effort with the tools installation/updates. Also, the most recent version of the tools needed to be accessible by all users across the network.

Tools Folder – The main task was creating an organized and scalable tools folder that contains all the maxscript files. The folder also contains an icon folder, which holds all the custom icons that were created for the tools. A generalHelperFuntions.ms was created in the folder, to contain scripts for the more commonly used functions shared across several tools. Finally, there was the macros.ms file, which contains macroscripts for every script added into the tools folder.

3ds Max setup – 3ds max can be asked to run scripts on startup from a particular folder. The Tools Folder was linked to 3ds max so that whenever 3ds max starts, all the functions contained in the scripts would be initialized (In hindsight, this could be further optimized by separating the base scripts to a different location, and only the macros would be run on startup. The macros themselves would contain the location of the base scripts which could be initialized lazily)

SVN – Once the tools folder was setup and tested with 3ds max, it was checked into SVN. Tools are added/updated and checked into SVN as and when needed. For adding a new script, macros.ms also needs an entry for it.

Client Side Setup – To install the tools for an end user, the Tools Folder would need to be checked out from the repo into the users local drive and 3ds Max would be directed to read scripts from that folder on startup. This is only a one time setup (unless 3ds Max forgets the path to the Tools Folder, in which case it will have to be done again) and is a fairly simple one too.

Client Side Update – Every time a tool is updated/added, the user can SVN update the Tools Folder and restart 3ds Max, and they would have the latest version of the tools up and running.


Managing Interactive Game Props

An interactive prop in a game would be any animatable object in the game world that a character interacts with. As an example, to implement a player turning a valve, the player must be positioned at the right place with respect to the valve. Both interaction animations (prop – ‘valve turning’ the player – ‘turning valve’) must be played in sync with each other. What programming needs to implement this:

  •  Some sort of locator node in the prop rig to determine the position of the player with respect to the valve. On pressing the ‘interact’ key somewhere close to the prop, the player will be interpolated to the correct position.
  • The player animation and valve animation, both should be exactly the same in length. These can be played when the player is at the correct position.

The last time we used interactive props, the animators were setting this up manually. The process would involve importing the prop rig (exposing potential naming conflicts) and manually placing the tag in the prop rig at the correct position. Once the prop and character have been animated, they would need to saved out into separate files. This is a very time consuming and error prone process. The ‘Interactive Prop Manager’ tool was created to automate all this for animators. On the surface, the tool allows the animators to import a a prop into an animation file and work on the character and prop in the same scene in Max. In our example, the valve rig can be imported into the player rig scene and the animator can animate the interaction.

propMgr

Step 1: Import prop – opens a file browser window to select a file. On import, the prop is placed in the scene using the character reference tag present in the prop file. This step also renames all the nodes in the prop file with a prefix to separate it from the character rig nodes for easy identification.

Step 2: Animate – Animator animates the character and rig.

Step 3: Export Prop – saves out the prop file as its own separate animation. The thing to consider here is that in the prop file, the prop is at the center of the scene, while in the character file, the prop would be offset due to the interaction. This offset is calculated using a non keyable prop root control curve. The prop root control curve will always stay in the center of the prop rig and can be used by the animator to place the prop within the the character rig file. The offset between the player reference tag and the prop root control curve will be the amount the prop scene would need to be moved in the prop rig after export. This offset will also move the player reference tag to the correct position.

prop_rig

the prop rig file

player_rig

the player rig file, with the prop imported and offset based on ‘player reference tag’

Smooth IK setup


smoothingAlgs

IK smoothing is used to soften the motion of the IK handle as the chain approaches full stretch. It can be set up in the 3ds Max by position constraining the IK handle to two targets with distributed weights. One target should be the IK control curve(CC in gif) and the other, an object placed at the position of the first bone in the IK(FB in gif) chain. The position weights need to be set as script controllers. Given the nodes CC and FB, we can calculate smoothing using the following script for the influence of CC –

Exponential Smoothing:
            x = (distance CC FB) – Rmin
            y = x
            if x > 0 do
            (
                        y = (D – Rmin)*(1-exp(-x/(D – Rmin)))
            )
            r = (Rmin + y)/(Rmin + x)

Trigonometric Smoothing:
            x = (distance CC FB) – Rmin
            L = Rmax – Rmin
            y = x
            if x > 0 and x < L do
            (
                        y = (D – Rmin)*sin(90*x/L)
            )
            r = (Rmin + y)/(Rmin + x)

Rmin is the minimum radius of influence beyond which smoothing starts to take action. Rmax, used only for the trigonometric method and it defines the maximum distance CC needs to be from FB for the arm to be completely stretched out. These values are shown in the figure as the blue curved lines (which are actually circles with the center at FB)

The weight influence of FB can be set as 1 – Influence of CC.

I personally prefer the trigonometric method because it contains the extra Rmin attribute, giving the user more control. Also, it has a more natural motion as CC approaches Rmax.

Forearm Twist Bone Setup Using Transforms

Here’s a setup to create a forearm twist bone ..

The twist bone is parented to the forearm bone and the X rotation of the twist bone is a script controller which has the following formula:

rot = (wrist.transform*(inverse foreArm.transform)).rotation
rotEuler = quatToEuler(rot) order:2
rotEuler.x/57.2952

Here, foreArm is the forearm bone node and wrist is the wrist bone node. The formula basically gets the transform of the the wrist bone with respect to the forearm bone and extracts the x rotation (local X axis points along the bone and z points up for all three bones). This is cleaner than a Look At constraint method and also does not use the controller of the wrist/forearm bones directly (which usually have a weighted orient constraint for FK/IK switching). This method does cause flipping when the wrist rotated more than 90 degrees sideways – an unlikely situation for wrists ( If you are getting the flipping on up and down rotation, try changing the rotation order in the the quatToEuler method )

If there are multiple twist bones, they can be orient constrained to the first twist bone and the forearm bone, with gradually decreasing weights of the twist bone’s influence as you move up closer to the elbow.